Here’s an update to our popular article Asterisk 1.4 with SNMP and Cacti using a remote box. This howto will be a little different in that it will be using Asterisk 1.6, the latest in the pipeline for Opensource PBX solutions from Digium. This process should be a little easier than it was last time, however will sacrifice a little bit of the “cool factor” (ie: security, etc) because it will be running local to Asterisk. Our test system won’t be affected by this, but if you’re running this on a live production server, you may want to combine information from the other howto for Asterisk 1.4 and remote Cacti monitoring instead of using this one.
REQUIREMENTS:
- Asterisk Server with Apache Installed (we’ll call it ASTERISK-BOX)
- Ubuntu or equivalent Linux dist installed
- Some Time
- Interest in nerdy graphs
So, lets get this party started right? First we’ll need to be clear on a few things, this tutorial expects that you have a fully functional PBX running on your network already, with Apache, PHP and MySQL already installed. We happen to be using FreePBX on our Asterisk 1.6 system so this is already taken care of for us. If you use command line Asterisk, or another GUI for Asterisk then your mileage may vary, but probably only by one or two sideroads if you catch my meaning.
First, lets get some stuff installed on our Asterisk/Apache server.
# apt-get install snmp snmpd libsnmp-base libsnmp-dev
Now, we have to recompile Asterisk 1.6 to use snmp, easy enough.
# cd /opt/asterisk/asterisk-1.6.0/
# ./configure –with-ssl –with-netsnmp –with-cap
# make menuselect
Now make sure that the res_snmp module is enabled under the resource modules submenu by pressing space when it’s selected if the “asterisk” character isn’t visible that means it’s disabled.
[*] res_snmp
A little aside here, I know I’ve mentioned this in the past but wow does the ncurses interface for Asterisk Configuration really blow me away. I always thought the Linux Kernel’s was cool, but it doesn’t even compare to what Digium and the Community has done for Asterisk PBX.
Okay, enough other crap, back to the task at hand.
Exit the configuration by pressing F12 to save and exit.
Now you’re back at your prompt and ready to build your Asterisk Source. Do so like this:
# make
# make install
We’ll have to enable res_snmp within asterisk now. If you haven’t, copy over the default configuration file to the Asterisk configuration directory. If you’ve already configured res_snmp from 1.4 you should compare the files for differences to make sure they match up between the Asterisk 1.4 and 1.6 Changes.
Still in the Asterisk 1.6 Source directory run this command
# cp configs/res_snmp.conf.sample /etc/asterisk/res_snmp.conf
Now enable NET-SNMP with Asterisk
# nano /etc/asterisk/res_snmp.conf
Make sure it looks like this.
[general]
subagent = yes
enabled = yes
Now, we should configure some NET-SNMP Options
First we’ll start with removing and backing up the original configuration file
# mv /etc/snmpd.conf /etc/snmpd.conf.orig
Now we’ll create our new file
# nano /etc/snmpd.conf
Input the following, editing to suit your environment
rocommunity YOUR.COMMUNITY.NAME
master agentx
#agentXSocket tcp:10.0.3.20:705
agentXperms 0660 0550 nobody asterisk
com2sec local localhost YOUR.COMMUNITY.NAME
com2sec mynetwork0 10.0.1.0/24 YOUR.COMMUNITY.NAME
com2sec mynetwork1 10.0.2.0/24 YOUR.COMMUNITY.NAME
com2sec mynetwork2 10.0.3.0/24 YOUR.COMMUNITY.NAME
com2sec mynetwork3 10.0.4.0/24 YOUR.COMMUNITY.NAME
group MyROGroup any local
group MyROGroup any mynetwork0
group MyROGroup any mynetwork1
group MyROGroup any mynetwork2
group MyROGroup any mynetwork3
view all included .1
access MyROGroup "" any noauth 0 all none none
*Note in the above script the permissions, and the nobody, asterisk. This is because I am running asterisk as asterisk:asterisk, so this is where agentX needs to connect. The username doesn’t matter apparently, but the group does.
Now, we have to modify the snmp default command line in the initialization script for NET-SNMP
# nano /etc/default/snmpd
Change the lines that looks like this
SNMPDOPTS='-Lsd -Lf /dev/null -u snmp -I -smux -p /var/run/snmpd.pid 127.0.0.1';
TRAPDRUN=no
TRAPDOPTS='-Lsd -p /var/run/snmptrapd.pid'
To ones that looks like this
SNMPDOPTS='-Lsd -Lf /dev/null -u snmp -I -smux -p /var/run/snmpd.pid 127.0.0.1 -x /var/agentx/master'
TRAPDRUN=yes
TRAPDOPTS='-a -Lf /var/log/snmptrapd.log -p /var/run/snmptrapd.pid'
Exit the file now
Now we should stop asterisk and net-snmp (if they are running)
# /etc/init.d/asterisk stop
# /etc/init.d/snmpd stop
Now we should start both back up. I use screen so I can do all of this.
# screen
screen# asterisk -vvvvvvvvvvvvvvvvvvvvgc
<hit CTRL-A-D>
Now we can start SNMPD
# /etc/init.d/snmpd start
If we enter our screen session again, we should be back at the Asterisk CLI with this message:
# screen -r
*CLI> NET-SNMP version 5.3.1 AgentX subagent connected
You can now exit asterisk and close the GNU Screen session.
*CLI> stop now
# exit
[screen is terminating]
#
First stop SNMP again, and then start them both up normally.
# /etc/init.d/snmpd stop
# /etc/init.d/asterisk start
# /etc/init.d/snmpd start
Now the configuration for SNMP and Asterisk is pretty much complete, but we should ensure that snmpd is going to run on the next boot of the Ubuntu 8.0.4 Server.
# update-rc.d snmpd defaults
Okay, so we’re pretty much done the setup now, lets just test it out. We should copy the Asterisk SNMP MIB’s over to the local MIB directory so we can walk the tree.
# cp /opt/asterisk/asterisk-1.6.0/doc/asterisk-mib.txt /usr/share/snmp/mibs/
# cp /opt/asterisk/asterisk-1.6.0/doc/digium-mib.txt /usr/share/snmp/mibs/
Now lets get to testing.
# export MIBS=+ASTERISK-MIB
# snmpwalk -c YOUR.COMMUNITY.NAME -v 1 localhost asterisk
You should see a big long list like this but with a lot more information:
ASTERISK-MIB::astChanTypeDesc.6 = STRING: Local Proxy Channel Driver
ASTERISK-MIB::astChanTypeDesc.7 = STRING: Standard Linux Telephony API Driver
ASTERISK-MIB::astChanTypeDesc.8 = STRING: Call Agent Proxy Channel
ASTERISK-MIB::astChanTypeDesc.9 = STRING: Objective Systems H323 Channel Driver
ASTERISK-MIB::astChanTypeDesc.10 = STRING: UNISTIM Channel Driver
ASTERISK-MIB::astChanTypeDesc.11 = STRING: Session Initiation Protocol (SIP)
ASTERISK-MIB::astChanTypeDeviceState.1 = INTEGER: true(1)
ASTERISK-MIB::astChanTypeDeviceState.2 = INTEGER: true(1)
ASTERISK-MIB::astChanTypeDeviceState.3 = INTEGER: false(2)
ASTERISK-MIB::astChanTypeDeviceState.4 = INTEGER: true(1)
ASTERISK-MIB::astChanTypeDeviceState.5 = INTEGER: true(1)
ASTERISK-MIB::astChanTypeDeviceState.6 = INTEGER: true(1)
ASTERISK-MIB::astChanTypeDeviceState.7 = INTEGER: false(2)
ASTERISK-MIB::astChanTypeDeviceState.8 = INTEGER: true(1)
ASTERISK-MIB::astChanTypeDeviceState.9 = INTEGER: false(2)
ASTERISK-MIB::astChanTypeDeviceState.10 = INTEGER: false(2)
ASTERISK-MIB::astChanTypeDeviceState.11 = INTEGER: true(1)
If this all worked, then you’re ready to move over to setting up Cacti because it’s all working. If this isn’t working, then go back and try this again to make sure you’re not missing a step or something.
So, lets begin the Cacti Setup for Asterisk 1.6 and SNMP portion of this tutorial yes?
First install Cacti the “ubuntu” way, and configure it with their prompts (selecting Apache2, and entering your mysql passwords for the cacti installation). If you’ve already installed Cacti on this server then please check the Cacti docs for what you have to do.
# apt-get install cacti
Now create our polling script
# nano /usr/local/bin/snmp_poller.sh
Copy this into it, modifying paths if you need to
#!/bin/bash
# filename: snmp_poller.sh
# created this to make the polling process easier
# Can make updates to it and such to add functionality
MIBS=+ASTERISK-MIB
export MIBS
/usr/bin/php /usr/share/cacti/site/poller.php
Now make it executable
# chmod 755 /usr/local/bin/snmp_poller.sh
Now, edit your crontab file so we can enable the polling script we just created.
# crontab -e
Then add this line, which will run the script every 5 minutes
*/5 * * * * /usr/local/bin/snmp_poller.sh > /dev/null 2>&1
Now we’ll have to chown the cacti configuration file because we’re running Asterisk and Apache as “asterisk:asterisk” on our system. Please customize this dependant on your configuration.
# chown root:asterisk /etc/cacti/debian.php
# chown root:asterisk /var/lib/cacti/rra
Exit and save the file, and now we are done on the console and can go into Cacti’s web interface for the rest of this tutorial.
In a browser hit your cacti installation
http :// your.cacti.ip.box /
Install Cacti as you normally would by following the prompts.
Now we have to setup Cacti as per mark’s instructions, just like in the old article.
The first step is to add the server to the Cacti database. First, click Create devices on the front page. Click the Add link on the right side of the screen.
Clicking add reveals a new screen where you will input basic information about connecting to the server. Fill out the fields, making sure to set the community name to COMMUNITY_NAME (what you put in snmpd.conf) Also, make sure the template is set to None, unless you know for sure you want another set of services automatically setup to be monitored. After clicking create, you’ll come to a screen with the systems in cacti, click the one you just created. Select SNMP ? Generic OID Template from the drop down menu under “Associated Graph Templates and click add. Add more services if you like, but this is the one we will use to connect to the Asterisk SNMP module.
Now that the server is setup, we need some graphs. Click the create graphs for this host link at the top. On this page, select the SNMP ? Generic OID Template by clicking the checkbox next to it. Select SNMP ? Generic OID template from the drop down menu and click create. Fill in the form with your basic information about the particular graph youre looking at. The vertical label will basically be the number of current calls in use.
To elaborate on the above, here’s a sample of one of my entries into Cacti
After you create the device, and add the Generic OID Template do this.
Go to your device, create a new graph, generic OID template, and enter your values like the following example:
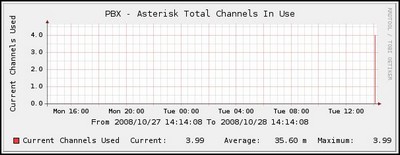
Title: |host_description| – Asterisk Channels In Use
Vertical Lable: Current Channels Used
Legend Color: Your Choice
Legend Text: Current Channels Used
Name: |host_description| – Asterisk Channels
Maximum Value: 100
Data Source: GUAGE
OID: .1.3.6.1.4.1.22736.1.5.1.0
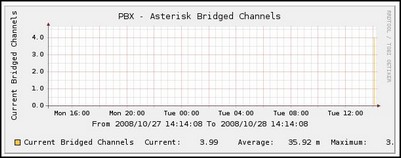
Title: |host_description| – Asterisk Bridged Channels
Vertical Lable: Current Bridged Channels
Legend Color: Your Choice
Legend Text: Current Bridged Channels
Name: |host_description| – Asterisk Bridged Channels
Maximum Value: 100
Data Source: GUAGE
OID: .1.3.6.1.4.1.22736.1.5.5.1.0
Title: |host_description| – Asterisk Active Calls
Vertical Lable: Current Active Calls
Legend Color: Your Choice
Legend Text: Current Active Calls
Name: |host_description| – Asterisk Active Calls
Maximum Value: 100
Data Source: GUAGE
OID: .1.3.6.1.4.1.22736.1.2.5.0
Title: |host_description| – Asterisk Calls Processed
Vertical Lable: Current Calls Processed
Legend Color: Your Choice
Legend Text: Current Calls Processed
Name: |host_description| – Asterisk Calls Processed
Maximum Value: 100
Data Source: GUAGE
OID: .1.3.6.1.4.1.22736.1.2.6.0
Title: |host_description| – Asterisk SIP Channels
Vertical Lable: SIP Channels Used
Legend Color: Your Choice
Legend Text: SIP Channels Used
Name: |host_description| – Asterisk SIP Channels
Maximum Value: 100
Data Source: GUAGE
OID: .1.3.6.1.4.1.22736.1.5.4.1.7.13
Title: |host_description| – Asterisk IAX Channels
Vertical Lable: IAX Channels Used
Legend Color: Your Choice
Legend Text: IAX Channels Used
Name: |host_description| – Asterisk IAX Channels
Maximum Value: 100
Data Source: GUAGE
OID: .1.3.6.1.4.1.22736.1.5.4.1.7.6
Title: |host_description| – Asterisk DAHDI Channels
Vertical Lable: DAHDI Channels Used
Legend Color: Your Choice
Legend Text: DAHDI Channels Used
Name: |host_description| – Asterisk DAHDI Channels
Maximum Value: 100
Data Source: GUAGE
OID: .1.3.6.1.4.1.22736.1.5.4.1.7.3
Title: |host_description| – Asterisk Bluetooth Use
Vertical Lable: Bluetooth Channels Used
Legend Color: Your Choice
Legend Text: Bluetooth Channels Used
Name: |host_description| – Asterisk Bluetooth Channels
Maximum Value: 100
Data Source: GUAGE
OID: .1.3.6.1.4.1.22736.1.5.4.1.7.5
Since the writing of the last article on the subject of SNMP and Asterisk 1.4, the values have again changed for Asterisk 1.6. Below is a listing of them for your convienience. This is where things have changed since we wrote our article in 2007 and when Mark wrote his article in April 2006. Now we have new OID’s to deal with which I will provide a listing of below:
Channel.1 = Media Gateway Control Protocol (MGCP)
Channel.2 = Skinny Client Control Protocol (Skinny)
Channel.3 = DAHDI Telephony Driver
Channel.4 = Gtalk Channel Driver
Channel.5 = Bluetooth Mobile Device Channel Driver
Channel.6 = Inter Asterisk eXchange Driver (Ver 2)
Channel.7 = Jingle Channel Driver
Channel.8 = Local Proxy Channel Driver
Channel.9 = Standard Linux Telephony API Driver
Channel.10 = Call Agent Proxy Channel
Channel.11 = Objective Systems H323 Channel Driver
Channel.12 = UNISTIM Channel Driver
Channel.13 = Session Initiation Protocol (SIP)
And a couple others that may be of interest to us number of channels, and bridged channels respectively.
ASTERISK-MIB::astConfigCallsActive.0
ASTERISK-MIB::astConfigCallsProcessed.0
ASTERISK-MIB::astNumChannels.0
ASTERISK-MIB::astNumChanBridge.0
Here are the ones I’m using
Overall Channels:
ASTERISK-MIB::astNumChannels.0


Overall Bridged:
ASTERISK-MIB::astNumChanBridge.0


Active Calls:
ASTERISK-MIB::astConfigCallsActive.0


Calls Processed:
ASTERISK-MIB::astConfigCallsProcessed.0


Overall SIP:
ASTERISK-MIB::astChanTypeChannels.13


Overall IAX:
ASTERISK-MIB::astChanTypeChannels.6


Overall DAHDI:
ASTERISK-MIB::astChanTypeChannels.3


Bluetooth In use:
ASTERISK-MIB::astChanTypeChannels.5
Now we’ll need to convert these into numerical OID format so Cacti can access them. This is very straight forward and done like this:
Here are the commands used to translate between numerical and alphabetic:
To convert from Alphabetic just do this for example:
# snmpwalk -On -c YOUR.COMMUNITY.NAME -v 2c YOUR.ASTERISK.IP.ADDY ASTERISK <MIB>
A real world example yields this:
# snmpwalk -On -c YOUR.COMMUNITY.NAME -v 2c localhost ASTERISK-MIB::astNumChannels .0.1.3.6.1.4.1.22736.1.5.1.0
# snmpwalk -On -c YOUR.COMMUNITY.NAME -v 2c localhost ASTERISK-MIB::astNumChanBridge .0.1.3.6.1.4.1.22736.1.5.5.1.0
# snmpwalk -On -c YOUR.COMMUNITY.NAME -v 2c localhost ASTERISK-MIB::astConfigCallsActive .0.1.3.6.1.4.1.22736.1.2.5.0
# snmpwalk -On -c YOUR.COMMUNITY.NAME -v 2c localhost ASTERISK-MIB::astConfigCallsProcessed .0.1.3.6.1.4.1.22736.1.2.6.0
# snmpwalk -On -c YOUR.COMMUNITY.NAME -v 2c localhost ASTERISK-MIB::astChanTypeChannels .13.1.3.6.1.4.1.22736.1.5.4.1.7.13
# snmpwalk -On -c YOUR.COMMUNITY.NAME -v 2c localhost ASTERISK-MIB::astChanTypeChannels .6.1.3.6.1.4.1.22736.1.5.4.1.7.6
# snmpwalk -On -c YOUR.COMMUNITY.NAME -v 2c localhost ASTERISK-MIB::astChanTypeChannels .3.1.3.6.1.4.1.22736.1.5.4.1.7.3
# snmpwalk -On -c YOUR.COMMUNITY.NAME -v 2c localhost ASTERISK-MIB::astChanTypeChannels .5.1.3.6.1.4.1.22736.1.5.4.1.7.5
Here are the commands used to translate between numerical and alphabetic:
To convert from Alphabetic just do this for example:
# snmpwalk -On -c YOUR.COMMUNITY.NAME -v 2c YOUR.ASTERISK.IP.ADDY ASTERISK-MIB::astChanTypeChannels.9
and it will spit out the numerical version of the OID, to see the alpha one just do this instead
# snmpwalk -c YOUR.COMMUNITY.NAME -v 2c YOUR.ASTERISK.IP.ADDY .1.3.6.1.4.1.22736.1.5.4.1.7.9
And now after we have that all sorted out and you have what you want to graph all figured out.
Now you’re ready to let the poller do it’s work. Make some calls, or stress test your Asterisk system using our SIPP howto and watch the graphs come to life. Here’s some samples right after we created our graphs.
Let me know how you make out and if you have any issues. We’re still trying to figure out how we can go about getting constant information instead of polled every 5 minutes, let us know if you have any tips!
Comments
Comment by Howie on 2009-02-23 11:04:51 -0500
I just posted some ‘canned’ templates for this job on the Cacti forums. Save youself the trouble of making your own, if all you want is the number of active channels (per type – SIP, Zaptel etc). The difference is that it’s one graph per type, but you do get to choose which types.
It’s here: http://forums.cacti.net/viewtopic.php?t=31296
Comment by Sebastian Cañete on 2009-04-08 12:27:31 -0500
Hello,
I just have a question. I already have installed Asterisk 1.6.0.6, can I follow the procedure “Monitoring Asterisk 1.4 with SNMP and CACTI for pretty graphs!” anyway? or should I follow this procedure? Or both.
Could someone please help me.
Thanks a lot in advance!
Comment by David on 2009-06-21 23:47:46 -0500
I followed the instruction carefully but I’m getting strange value on the graph. For example for the average usage of zap channel I get “275.05 m” and for the maximum I get 2.58
First how can the average be higher than the maximum ( I don’t know waht mean the unit “m”) and How can I get a maximum value of 2.58 ?
Thx
Comment by Adelson Junior on 2009-09-25 16:39:19 -0500
Hi. I followed the manual, and I was able to test the snmp using snmpwak / snmpget.
But, unfortunately, I could not get response when I query the SIP channels OID (.1.3.6.1.4.1.22736.1.5.4.1.7.13 neither ASTERISK-MIB::astChanTypeChannels.13).
Do you have any idea what I’ve done wrong? Why couldn’t I get response only on this OID.
Thanks in advance.
Comment by Dago on 2009-11-06 11:47:17 -0500
First of all…. thanks for this tutorial…..
I was following carefully this guide, but when i get to modify /etc/default/snmpd, I copy exactly what you write, but when I try to stop snmpd, I get this output
root@Asterisk-box:~# /etc/init.d/snmpd stop
/etc/default/snmpd: 11: -Lf: not found
After start asterisk with “asterisk -vvvvvvvvvvvvvvvvvvvvgc” command, it yeald
“Warning: Failed to connect to the agentx master agent ([NIL]): "
What am I doing wrong?
Thanks
Comment by Matt G on 2009-11-06 20:28:17 -0500
Hm, I don’t think you’re doing anything wrong, but it’s posible the options for snmp have changed. try running it from a command line, and seeing what -Lf do.
Comment by Dago on 2009-11-09 10:08:59 -0500
mmmm…. sorry, but I don’t understand you. Can you be more specific?
thanks
Comment by Matt G on 2009-11-09 22:11:37 -0500
Hey Dago,
Sorry, what I meant was run snmp directly from the command line, not the script.
so like
/usr/bin/snmp
and try out the command line arguments associated with it from the script (-Lf) and see if it still causes issues. Running it this way will give you complete debug information so you can try and troubleshoot easier.
HTH,
VP
Comment by Dago on 2009-11-16 10:07:50 -0500
ok … thanks….. I’l try that