Today we’re going to talk about an interesting program from APSTel Visual Dialplan, which enables you to create Dialplans for your Asterisk PBX in a visual method. This enables both new Asterisk users, and seasoned professionals to quickly and efficiently create Asterisk Dialplans.
If you’d like to download APSTel Visual Dialplan Professional or Standard edition to give it a try yourself, please use these links.
This article is the first in a series of four, describing the inner workings of the product, how to use it, some advanced features, deploying dialplans and finally a review on the product. We encourage everyone to use this program, and upload their dialplans to our sister site, Rate My Asterisk Dialplan.
Now onto the article. When you first open up APSTel Visual Dialplan you are presented with the register application window. If you don’t have a registration code, you can go ahead and try the trial version out. If you have a registration key, you may enter it now.
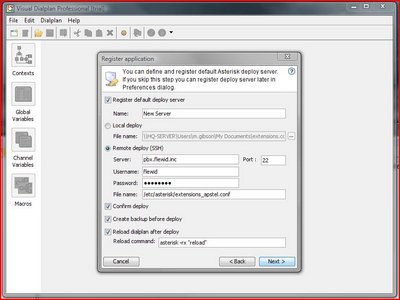
Upon entering the registration key, you’ll be shown the Register Application screen, which lets you setup the basic properties of the Asterisk Server you will be connecting with to deploy your Asterisk Dialplans. You can set this up for now, or you can also do it later. We’ve entered some default values here to show you what it looks like, but we chose to set it up following our initial Dialplan creation, which will be explained later.
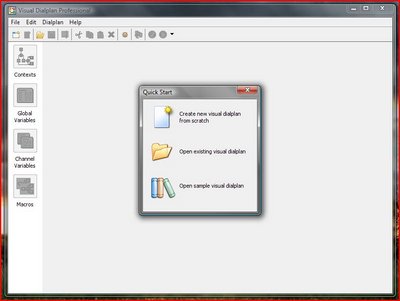
From here we’ll go ahead with the normal operation of the program. Once you open up APSTel Visual Dialplan you’ll be asked to create a new Asterisk Dialplan, Open an Existing Asterisk Dialplan, or open and use one of the APSTel Sample Asterisk Dialplan Examples to play around with. For the purposes of this article, we will create a new Asterisk Dialplan from scratch.
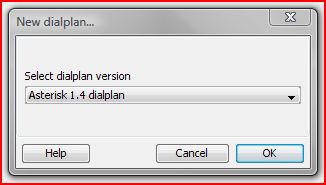
Once you have clicked the New Asterisk Dialplan wizard, you will be presented with a dialogue asking if you’d like to create your Dialplan for Asterisk 1.2 or Asterisk 1.4. Support for the latest beta, Asterisk 1.6 is not supported yet, but will be in the future.
After selecting the type of Asterisk Dialplan you wish to create, you’ll be given the choice to name your initial context. You can name this anything you want just like you would when creating a new context in your already existing Asterisk extensions.conf
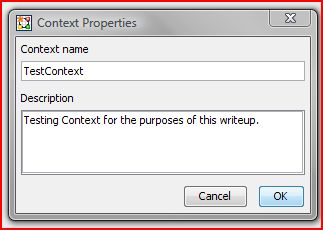
We have created our Asterisk context with the name “TestContext” and a little description so we know what it is when looking at the APSTel Visual Dialplan Context Interface. After you have clicked the ok button to continue, you’ll be given the Visual Dialplan Context window for the context you have just created. This is where you can create your Asterisk Dialplan in a visual manner, with interactive configuration abilities.
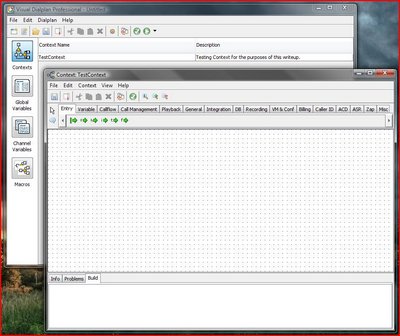
Most of your attention will need to be focused here when you are within the visual Dialplan creation window. This is where you will select the Asterisk Dialplan applications that you want to use. Separated in a tabbed list of functionality, hovering over them will give you the text description of each icon. We found this very intuitive and easy to use for both new and experienced Asterisk Users. The contextual help is handy.

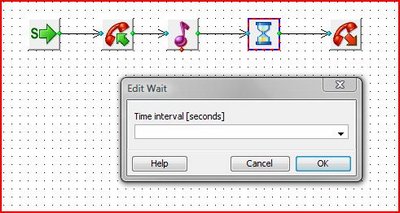
Using commands from the menu above, we created a very simple Asterisk Dialplan example. This dialplan simply starts, Answer()’s the Line, Playback()’s a sound file, Wait()’s for a second, then Hangup()’s the line. We simply selected the dialplan application we wanted to use, and then drew a box on the Asterisk Dialplan creation window and it would instantly appear. Linking the boxes was as simple as dragging from one box’s dot to the other box’s dot. It is worthwhile to mention that you must be careful of the spacing on your visual Asterisk Dialplan elements as if they are too close together the lines will go off in funky wrapped directions.
To modify the elements of the Asterisk Dialplan we created, we simply right clicked on one that required configuration and then edited it from the contextual menu. For example, here is the Time Interval menu.
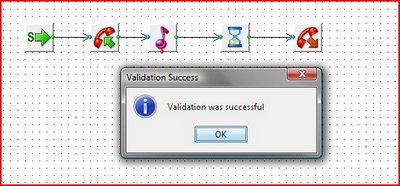
Once we were satisfied with our test Asterisk Dialplan, we went up to the menu and chose the validate button, this can be found both in the title menu, and in the icons at the top of the program. Nice and easy to find, and convenient to have for newer asterisk users that need to verify their configuration.
We are now finished creating our basic Asterisk Dialplan and run-through of the basic features of APSTel Visual Dialplan Professional. Keep reading for some advanced topics and more information.
That tops off the first article in our four part series about APSTel Visual Dialplan Professional, Stay tuned for the next article in the series about some of the advanced features this program offers.
If you’d like to download APSTel Visual Dialplan Professional or Standard edition to give it a try yourself, please use these links.