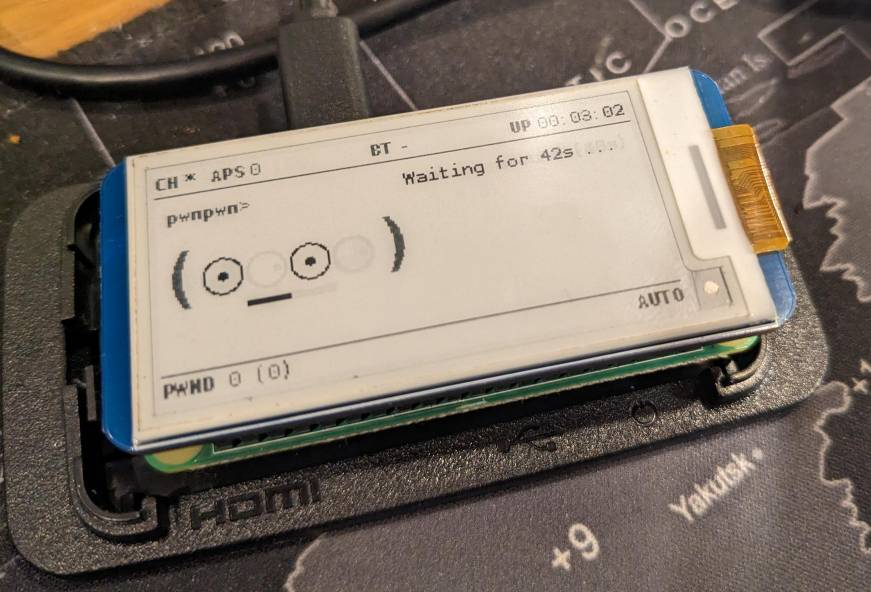
If you saw the other article I posted today you’ll see I got Pwnagotchi working on my Raspberry Pi 3. This is how to set it up properly on a PiZero WH using a Waveshare V3 e-ink screen.
How to Get’r running
get the image from here
extract
$ 7z e pwnagotchi-raspios-lite-1.6.2.7zburn o microsd where
/dev/sddis your microsd card.$ sudo dd if=pwnagotchi-raspios-lite-1.6.2.img of=/dev/sdd bs=1Mnow you wanna edit your config file before unmounting
$ sudo nano /run/media/username/boot/config.tomlpaste this in and edit to your config
 main.name = "pwnagotchi"
 main.lang = "en"
 main.whitelist = [
 "EXAMPLE_NETWORK",
 "ANOTHER_EXAMPLE_NETWORK",
 "fo:od:ba:be:fo:od",
 "fo:od:ba"
 ]

 main.plugins.grid.enabled = true
 main.plugins.grid.report = true
 main.plugins.grid.exclude = [
 "YourHomeNetworkHere"
 ]

 ui.display.enabled = true
 ui.display.type = "waveshare_3"
 ui.display.color = "black"
before removing sd card, edit
/boot/config.tomland change anything you need to in there$ sudo nano /run/media/username/boot/config.tomlNow, unmount the drive
$ sudo umount /dev/sdd*put the microsd in the raspberry pi
now plug the pi into your computer. i’m using a macbook for testing purposes. i manually configured the
RNDIS/Ethernet Gadgetinterface with the following:ip: 10.0.0.1 netmask: 255.255.255.0 router: 10.0.0.1 dns servers: 8.8.8.8Then from the terminal on the macbook i made sure I could see the raspberry.
$ ping 10.0.0.2Once that is successful you’re good to go to continue and ssh to it
$ ssh pi@10.0.0.2

password: raspberry
Now, back on the Mac, you want to DISABLE connection sharing on the macbook if it’s turned on. just put the slider to off.
go to apple -> system settings -> general -> sharing -> internet sharingIt should look like this now

- Then, you want to go to
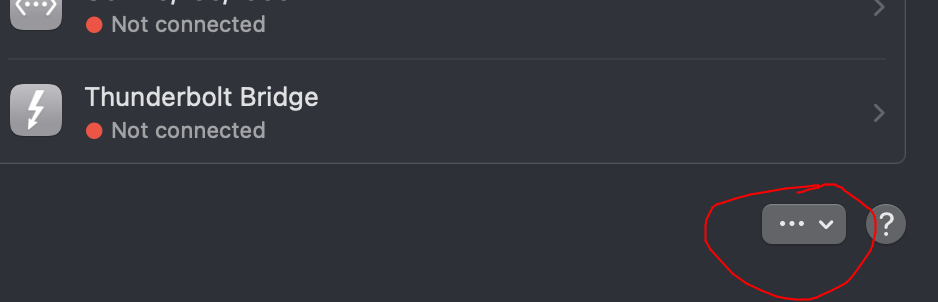
system preferences -> networkand click the three dots and down arrow icon at the bottom
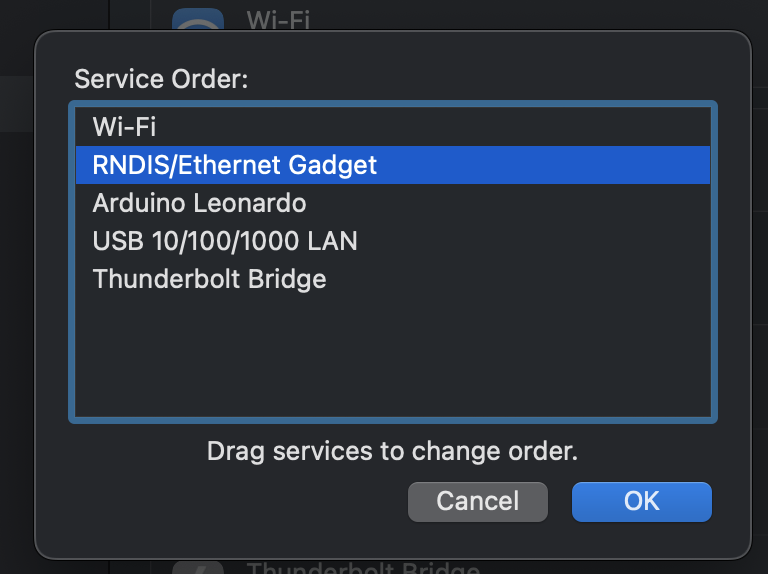
- Now you want to drag it so you have the wifi adapter as the first item in the list, and the usb interface follows it, like this. Then click
okay.
Now, you want to create your sharing script on the mac, there seems to be a lot of confusion about this out there. The script runs on the
hostcomputer, not on the raspberry pi in order to setup sharing. More on this here# nano ~/pwn_macos_sharing.shpaste this in, then exit and save the file.
#!/usr/bin/env bash

UPSTREAM_IFACE=${1:-en0}
USB_IFACE=''
USB_IP=${2:-10.0.0.1}

for i in $(ifconfig -lu); do
if ifconfig $i | grep -q "${USB_IP}" ; then USB_IFACE=$i; fi;
done

if [ -z "$USB_IFACE" ]
then
echo "can't find usb interface with ip $USB_IP"
exit 1
fi

echo "sharing connecting from upstream interface $UPSTREAM_IFACE to usb interface $USB_IFACE ..."

sysctl -w net.inet.ip.forwarding=1
pfctl -e
echo "nat on ${UPSTREAM_IFACE} from ${USB_IFACE}:network to any -> (${UPSTREAM_IFACE})" | pfctl -f -
exit and save the file, then make it executable
$ chmod +x ~/pwn_macos_sharing.shrun your script replacing these with your interfaces if different (en0 is my wifi, en7 is the usb gadget)
$ sudo ~/pwn_macos_sharing.sh en0 en7You should now be all setup to access the internet from your pwnagotchi. So open your terminal, or, ssh back to it if you’ve lost it during all this setup
$ ssh -l pi 10.0.0.2
password: raspberry
let’s update, and upgrade everything to be sure
$ sudo apt-get update
$ sudo apt-get upgrade
Change your password so it’s more secure, then, reboot just incase whatever updated
$ passwd
<enter current password = raspberry>
<enter new password>
<enter new password>
$ sudo reboot
now lets setup bluetooth
$ sudo nano /etc/pwnagotchi/config.tomlpaste this in
main.plugins.bt-tether.enabled = false
main.plugins.bt-tether.devices.android-phone.enabled = false          # the name of this entry is android-phone
main.plugins.bt-tether.devices.android-phone.search_order = 1         # in which order the devices should
                                                                        ## be searched. E.g. this is #1
main.plugins.bt-tether.devices.android-phone.mac = ""                 # you need to put your phones
                                                                        ## bt-mac here (settings > status)
main.plugins.bt-tether.devices.android-phone.ip = "192.168.44.44"     # this is the static ip of your pwnagotchi
                                                                        ## adjust this to your phones pan-network
                                                                        ## (run "ifconfig bt-pan" on your phone)
                                                                        ## if you feel lucky,
                                                                        ## try: 192.168.44.44 (Android) or
                                                                        ## 172.20.10.6 (iOS)
                                                                        ## 44 is just an example, you can choose
                                                                        ## between 2-254 (if netmask is 24)
main.plugins.bt-tether.devices.android-phone.netmask = 24             # netmask of the PAN
main.plugins.bt-tether.devices.android-phone.interval = 1             # in minutes, how often should
                                                                        ## the device be searched
main.plugins.bt-tether.devices.android-phone.scantime = 10            # in seconds, how long should be searched
                                                                        ## on each interval
main.plugins.bt-tether.devices.android-phone.max_tries = 10           # how many times it should try to find the
                                                                        ## phone (0 = endless)
main.plugins.bt-tether.devices.android-phone.share_internet = false   # set to true if you want to have
                                                                        ## internet via bluetooth
main.plugins.bt-tether.devices.android-phone.priority = 1             # the device with the highest
                                                                        ## priority wins (1 = highest)

main.plugins.bt-tether.devices.ios-phone.enabled = false              # next device...
main.plugins.bt-tether.devices.ios-phone.search_order = 2
then edit accordingly, this is what I ended up with for my pixel 5 running GrapheneOS
main.plugins.bt-tether.enabled = true
main.plugins.bt-tether.devices.android-phone.enabled = true          # the name of this entry is android-phone
main.plugins.bt-tether.devices.android-phone.search_order = 1
main.plugins.bt-tether.devices.android-phone.mac = "XX:XX:XX:XX:XX:XX:XX"
main.plugins.bt-tether.devices.android-phone.ip = "192.168.44.44"
main.plugins.bt-tether.devices.android-phone.netmask = 24
main.plugins.bt-tether.devices.android-phone.interval = 1
main.plugins.bt-tether.devices.android-phone.scantime = 10
main.plugins.bt-tether.devices.android-phone.max_tries = 10
main.plugins.bt-tether.devices.android-phone.share_internet = true
main.plugins.bt-tether.devices.android-phone.priority = 1
now, while still in the file, add this to limit writes to the sdcard to prolong it’s life.
fs.memory.mounts.log.enabled = true     # switch
fs.memory.mounts.log.mount = "/var/log" # which directory to map into memory
fs.memory.mounts.log.size = "50M"       # max size to put into memory
fs.memory.mounts.log.sync = 60          # interval in seconds to sync back onto disk
fs.memory.mounts.log.zram = true        # use zram for compression (recommended)
fs.memory.mounts.log.rsync = true       # use rsync to copy only the difference (recommended)
then, while still in the file, setup the web access details
ui.web.username = "my_new_username"
ui.web.password = "my_new_password"
exit and save the file, then reboot in auto mode
$ sudo touch /root/.pwnagotchi-auto && systemctl restart pwnagotchibluetooth is probably not connecting right now, it wasn’t for me, so then I had to go back on the macbook and do some more settings.
Make sure to explicitly enable Bluetooth Tethering on your Phone (usually in Settings -> Hotspot or similar) before pairing. Otherwise your Pwnagotchi will pair with your phone but you won’t be able to create a Personal Area Network (PAN) even if you enable it after.
    $ ssh pi@10.0.0.2
    $ sudo bluetoothctl
Then within the bluetoothctl type this
[bluetooth]# scan onNow, look for your phone’s MAC address on the list, and type
[bluetooth]# pair XX:XX:XX:XX:XX:XX
Attempting to pair with XX:XX:XX:XX:XX:XX
[CHG] Device XX:XX:XX:XX:XX:XX Connected: yes
Request confirmation
[agent] Confirm passkey 999999 (yes/no): yes
Now you want to trust the device
[bluetooth]# trust XX:XX:XX:XX:XX:XX
[CHG] Device XX:XX:XX:XX:XX:XX Trusted: yes
Changing XX:XX:XX:XX:XX:XX trust succeeded
You’ll now see a popup on your phone to accept the pairing, and, the agent will ask for confirmation. Hit
pairon your phone, and on the command line typeyesto finalize the pairing.now you can exit the bluetooth controller
[bluetooth]# quitthen, issue a reboot and your phone should connect
$ sudo rebootyou should be good to go now and start installing some plugins and learning more about the pwnagotchi
Note, to access the web interface, you have to go back to system settings, and change the order of the networks to put the usb device first again, then you can access the ui at
http://10.0.0.2:8080. This seems sub-optimal to me, but it works for basic config/viewing/testing.